Upright Piano Gut
I had done a ton of research on ways to best house a stage keyboard. Time after time I kept coming back to a piano shell. I knew it was a daunting task and would’ve preferred to build one from scratch, but ultimately for the right look I knew we needed to gut an old upright. There were a lot of steps involved in this process so I’ll detail them below.
1. First step is to find a free piano from searching online or by someone you know who wants to get rid of theirs. The only issue will ultimately be the weight of the piano, so make sure you have the right group of people to help, and also a strong enough vehicle to move it. Here is a picture of the original piano I found which someone so kindly gave away for free.

2. Next step was to take out the piano keys and hardware as safely as we could. This part is actually pretty easy. Basically you will need to look for any screws holding the cover on, wiggle it out, then start deconstructing by pulling out all the keys, the piano bed, the hammers, etc... one item at a time. This may have been the quickest process throughout. Once you have it emptied, you will need to make a decision as to whether you want to leave in or take out the harp and strings.


3. I wasn't sure which grit sandpaper I would need so I actually started with 220, and ended up using mostly 180 to finish it out. I used my orbital sander to accomplish most of the large area sanding, but of course had to hand sand the legs and crevices of the piano. I didn't go crazy trying to get every part of it down to original wood. There were some rough spots that I sanded more than others, but ultimately I knew the paint would have primer in it so I just made sure it was a good surface sanding throughout the whole piano. This takes some patience and is definitely messy, so I recommend doing this process outside if possible and with a mask. There will be a lot of small particles floating around.


After you've finished sanding, this will be the time to get out a vacuum and some rags and give the piano a really good cleaning. Makes sure to get rid of all the dust, and when you use some rags, make sure they're not too wet, but damp enough to soak up the surface dust. Finding a way to clean out the bottom of the back panel is tricky, but by using some vacuum adapters and flat head screw driver to take out the large items, I was able to clean it fairly well.
4. Finally, now I could start painting. I picked up Sherwin Williams Ovation Plus and used a flat tricorn black. The decision of staining vs color really comes down to your overall stage design. We're in the middle of a long term renovation right now and I know the stage will be black, so I used a flat black and left the back panel as wood to tie into the rest of the room. I highly recommend a cutting brush for the hard to reach areas, especially the legs if they have as much character as this piano did. I avoided rollers because I didn't want two different textures on the piano. The bench is shown below as well, this is really only going to be used for computers, in ear monitor control, etc..., as sitting on a wooden bench for hours is really uncomfortable.


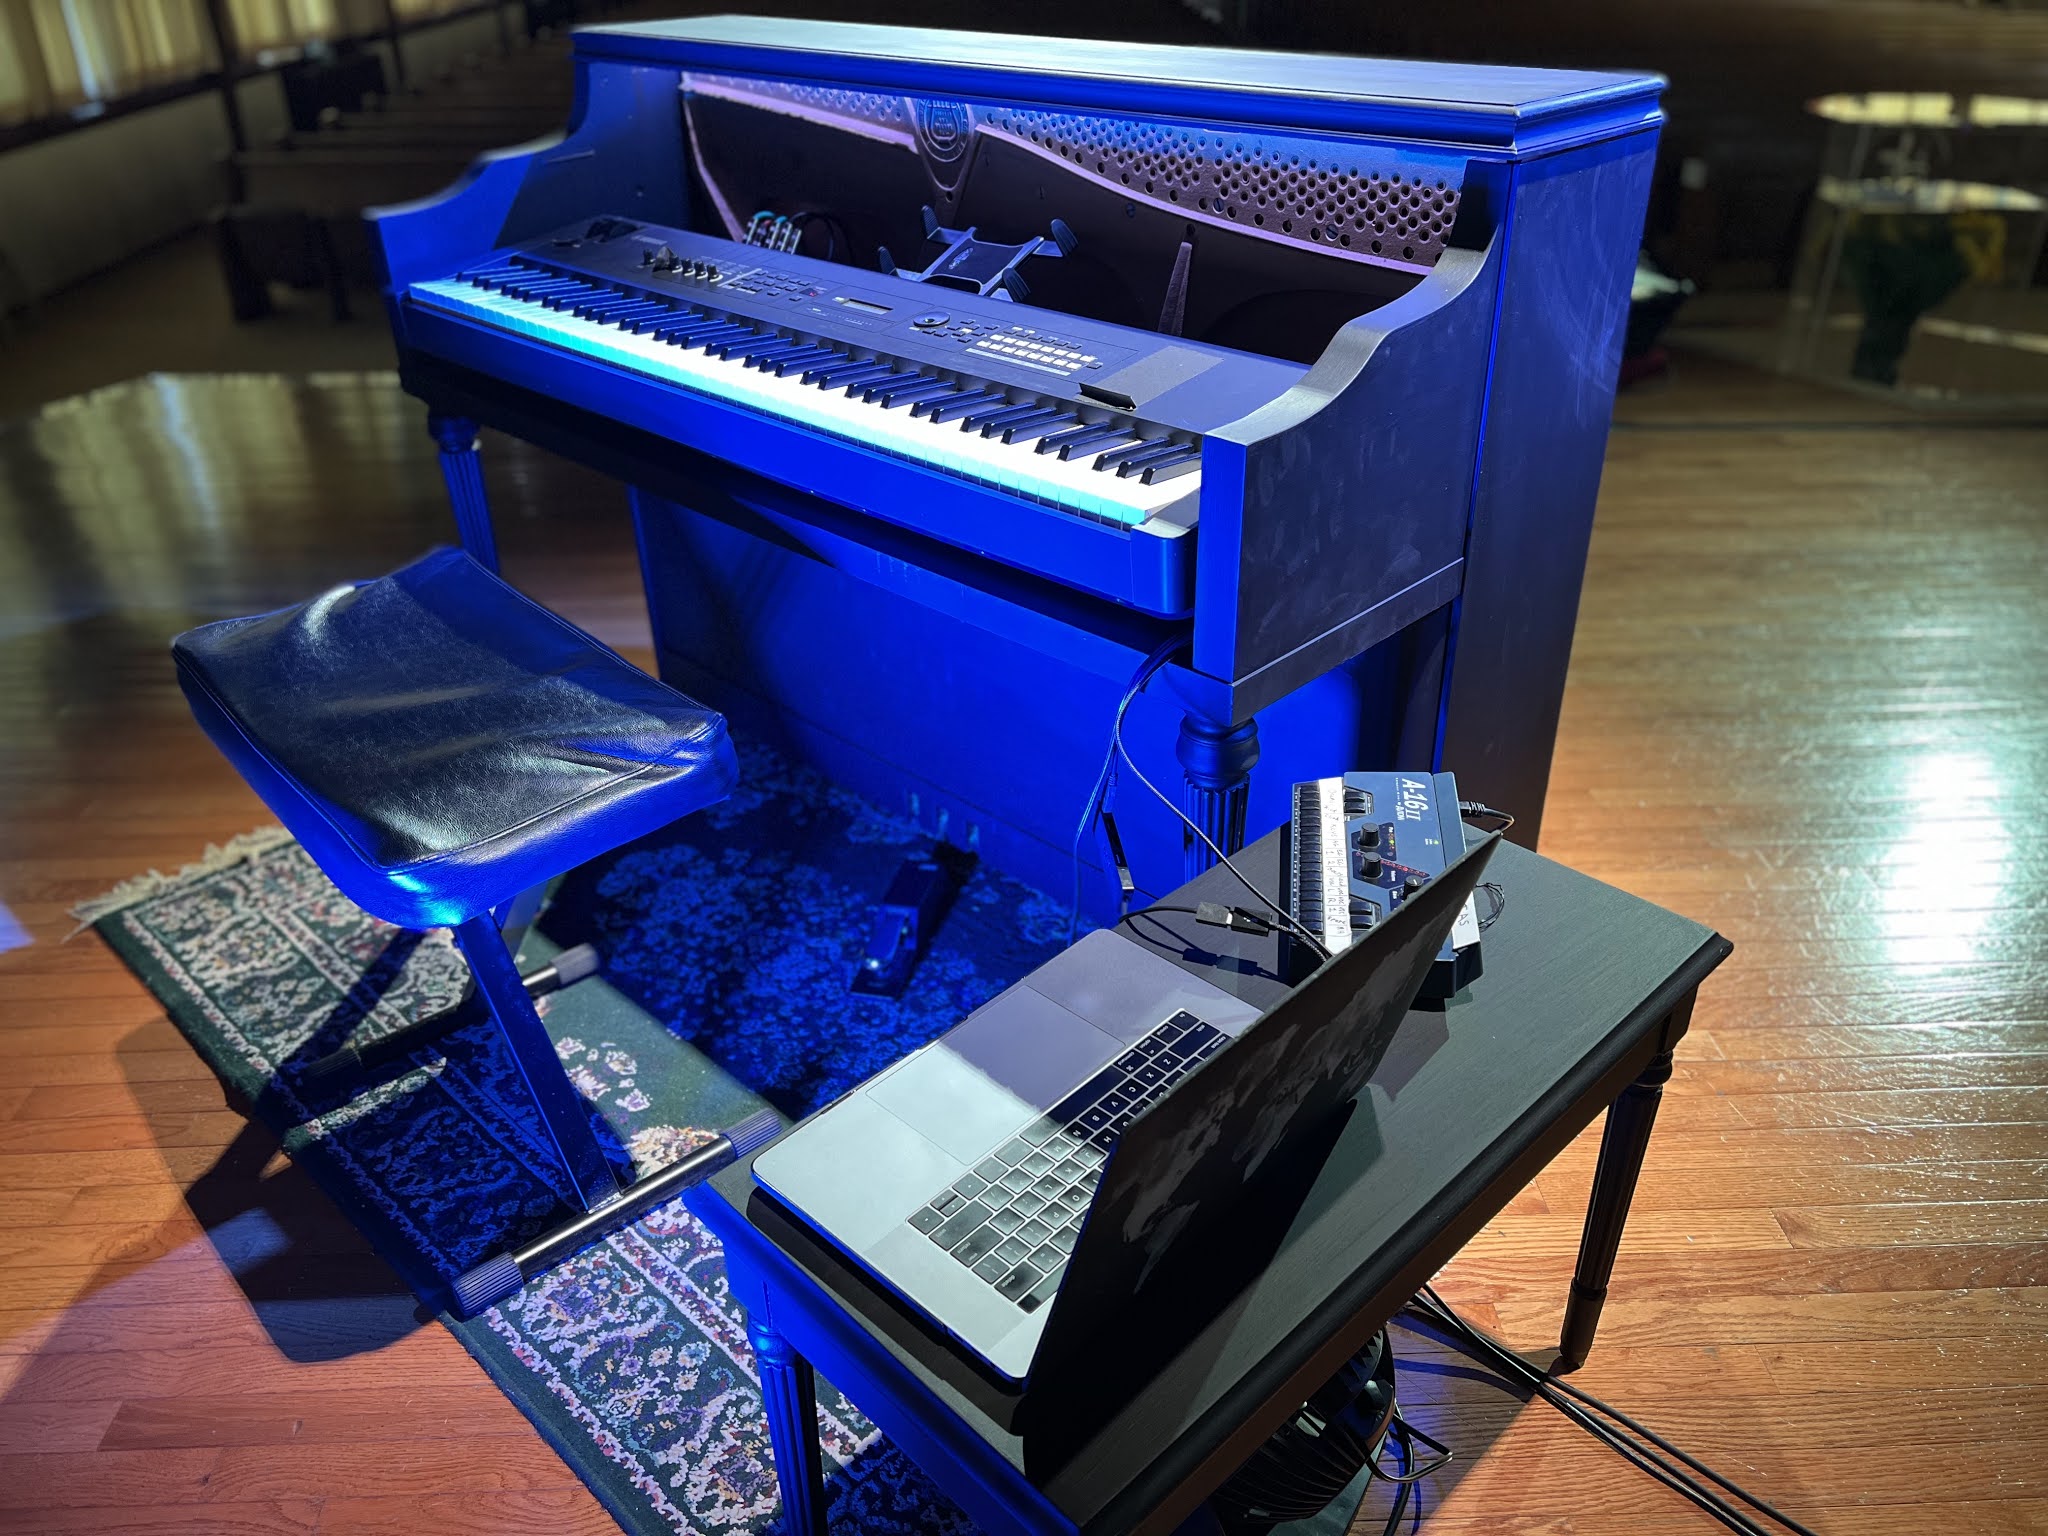
5. Connectivity... You can see on the bottom right of the piano a power plug and four 1/4” jacks. We are using a Hosa SLW-333 stereo switch to swap between the Yamaha MX88 and our Presonus 26c (will be housed behind the bottom panel). The stereo outputs of the switch go direct to the first two outputs on the bottom right, and then the interface’s outputs 3/4 are sent to the 3/4 of the bottom outputs. This allows us to easily switch between the native piano sounds or Ableton/Mainstage, and also maintain a click or track through the other outputs. 1/4" connections are by Temple Audio called the 4X MOD, and the power adapter is a WELLUCK AC Power Inlet Port Plug with 18" extension cord. This allows the piano to be easily unplugged and moved without removing/uplugging any of the internal electronics.


The 18" extension cord from the WELLUCK plug connects to a Monster Power strip easily accessible on the right side of the piano.

6. I also wanted to provide some light under the top cover to light up the controls below. In order to keep light from seeping out from the cracks at the top I used a little gaffer tape along the seam. The internal lighting is powered via USB into the power strip (seen above). But the ability to change colors really adds great depth to the overall look for the piano player.


8. Now I was finally able to put in our keyboard and wire up the piano accordingly. 1/4" cables to the A/B switch and piano shell outputs, and usb cables out of the interface and piano easily accessible for anyone to hook up their computer were completed.

Closing thoughts:
Cost was minimal. Piano was free, Uhaul was not. If you already have the power tools, then no cost there. Buying some sandpaper and specific tools for string removal etc… I believe you could find all this for around $50. The adapters for power and 1/4” plugs were just shy of $80 total. Added cost for paint and a few paintbrushes around $100. Most of the cost came with the adapters and cables adding up to around an extra $320 (including the interface). But if you just wanted to have the piano shell and not the computer hook up, it's obviously less.
In the end, this was well worth the time, but you have to be prepared for it to take just that…time. All in all, I spent around 20hrs on this project not including the research for materials, shopping, and process research like you're doing now. Be safe, smart and take your time if you do a project like this. It’s always good to think through the process before you start. What will this accomplish, what could go wrong, why do I need this, do I have the resources and help I need. As someone who's run many projects, there's nothing worse than getting part way through and realizing you need help from someone else, or forgot an additional cost. I've always found it helpful to map out all my costs ahead of time, including shipping and taxes, and even ensuring I have the right people involved.
Have fun, and I hope this was helpful!

Comments
Post a Comment